Here’s Exactly How To Make Bath Bombs (Bring on the Fizz and Fun!)
There are only six easy steps between you and a fizzy, colorful bath.
Using a bath bomb is an easy, relaxing way to upgrade bathtime. Most adults agree it's a lush, spa-like experience and most kids love the fun fizz and the rainbow water. But instead of paying an arm and a leg for a premade bath bomb at a bath and body store, you can learn how to make bath bombs yourself. It's cheaper and it's a fun DIY.
With these instructions, you'll be able to not only have a crafty afternoon, but an extra colorful and relaxing bath experience later on.
Keep reading for more information on bath bombs—what supplies you need, ingredients to use and how to make them.
Here at Parade.com, we're all about sharing products we love with our audience. When you make a purchase on an item seen on this page, we may earn a commission, however, all picks are independently chosen unless otherwise mentioned.
View the original article to see embedded media.
What Are Bath Bombs?
Bath bombs usually come in a circular shape and they're packed with fragrance—essential oils, dyes, and/or perfumes—and oftentimes, Epsom salt. The primary three ingredients are baking soda, citric acid and cornstarch, according to Live Science.
Before lowering into the bath, you can throw one in the tub while the water is still running. The citric acid inside will cause a chemical reaction that results in the bath bomb fizzing, creating bubbles, turning the water into different colors, and eventually, dissolving.
Related: 150 Random Shower Thoughts That Will Make You Laugh and Think
Because of that chemical reaction, bath bombs are single-use. They'll dissolve on their own but since they can only be used once, what's the point of a bath bomb?
Aside from the aromas and bright colors, which create an enhanced bathtime experience, bath bombs can also include ingredients that hydrate skin and remedy dryness. It can make your skin feel really, really soft too—more so than lotion.
Bath Bomb Supplies
You will need the following supplies to make a bath bomb:
Baking sheet
Glass jar (small)
Measuring cup and spoons
Mixing bowl
Stirring utensil
Bath Bomb Ingredients
You will need the following ingredients to make a bath bomb:
1 cup baking soda
1/2 cup citric acid
1/2 cup Epsom salt
1/2 cup Corn Starch
2 1/2 Tbsp coconut oil Melted
3/4 Tbsp water
8-15 drops essential oils (popular ones include lavender, orange, peppermint and eucalyptus)
Bath Bomb molds (see notes under craft steps)
Optional: Food-grade dried lavender flowers or fresh rosemary
Liquid coloring for soap
How To Make Bath Bombs Step-by-Step
To make bath bombs yourself, read the following step-by-step instructions:

Step 1: In a mixing bowl, combine all dry ingredients together—baking soda, citric acid, cornstarch and Epsom salt—and use a fork, spoon or whisk to stir them all together. You want to make sure the mixture is a smooth powder, not clumpy. If you're using the optional dried herbs or flowers, you can add them in now as well. Set the bowl aside.

Step 2: Add all the wet ingredients—coconut oil, essential oil(s) of your choice and water—together into the glass jar.
View the original article to see embedded media.
Step 3: Now for the color! With the color of your choice, add 1 to 2 drops to the wet ingredients. Stir. If you're only using one color, skip to step 4.
If you want to make a bath bomb that has two colors, you have to split the wet ingredients in half; then split the dry ingredients in half. Add 1 to 2 drops of the first color into one of the wet mixtures; add 1 to 2 drops of the second color to the other wet mixture. Then continue to step 4.

Step 4: Bit by bit, pour the wet mixture into the dry mixture. This has to be done extremely slowly because if you add it too quickly, it will fizz up. Pro tip: You may want to use a whisk for this part.
Step 5: Once combined, knead the mixture together kind of like a dough, adding small bits to the bigger "ball" at a time. If it's too dry, it won't combine well so add a little bit of water until it is more moldable.
View the original article to see embedded media.
Step 6: It's time for the molds! If you're using only one color, fill both sides of the circular mold, packing it in tightly but still with just a little bit of overflow. Put the two pieces of the mold together, scraping off any excess. Remove one side of the mold and place it (with the other half mold still on it) on a baking sheet to dry. Let it sit for one hour and then you can remove the other side of the mold.
Warmbuy 12 Pcs DIY Metal Bath Bomb Molds, Set of 6


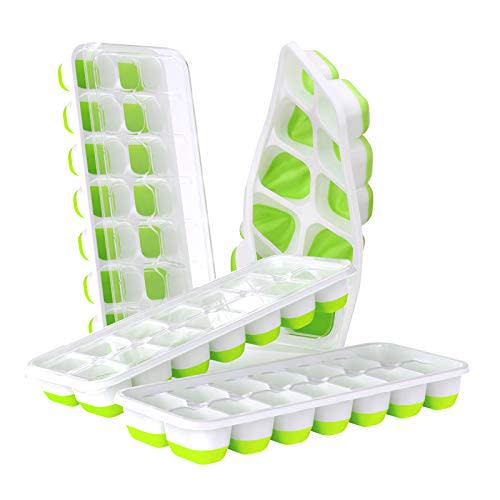
Not using a circular mold? No problem. A silicone ice tray can also work. To use this method, add the bath bomb mixture into each ice cube mold, flattening it down so the tops are smooth. You should wait 10 minutes before turning the tray over and removing them. Let them dry overnight.
DOQAUS Ice Cube Trays 4 Pack, Easy-Release Silicone & Flexible 14-Ice Cube Trays with Spill-Resistant Removable Lid, LFGB Certified and BPA Free, for Cocktail, Freezer, Stackable Ice Trays with Covers
If you're using two colors, fill one side of the circular mold with one color and fill the other side with the other color. Put the two pieces of the mold together, scraping off any excess. Remove one side of the mold and place it (with the other half mold still on it) on a baking sheet to dry. Let it sit for one hour and then you can remove the other side of the mold.
Finally, if you're using two colors and a silicone ice cube tray, fill half of the tray with the first color, then add the second color on top. Flatten it down so the tops are smooth, then wait 10 minutes before turning the tray over and removing them. Let them dry overnight.

Your homemade bath bombs are now officially ready to use. (Another pro tip: They also make great gifts!).
And if you'd rather find a pre-made dry mix for bath bombs, those exist too!
Bath Bomb 9 lbs Ready Mix of Citric Acid and Baking Soda (Sodium Bicarbonate) - Shipped in a Safety Sealed PP GLC Pail with a resealable lid and Removable Handle - USA Made - Non GMO

This might save you a little bit of time while making your DIY bath bombs!
Next up, the best 100 crafts for kids.
